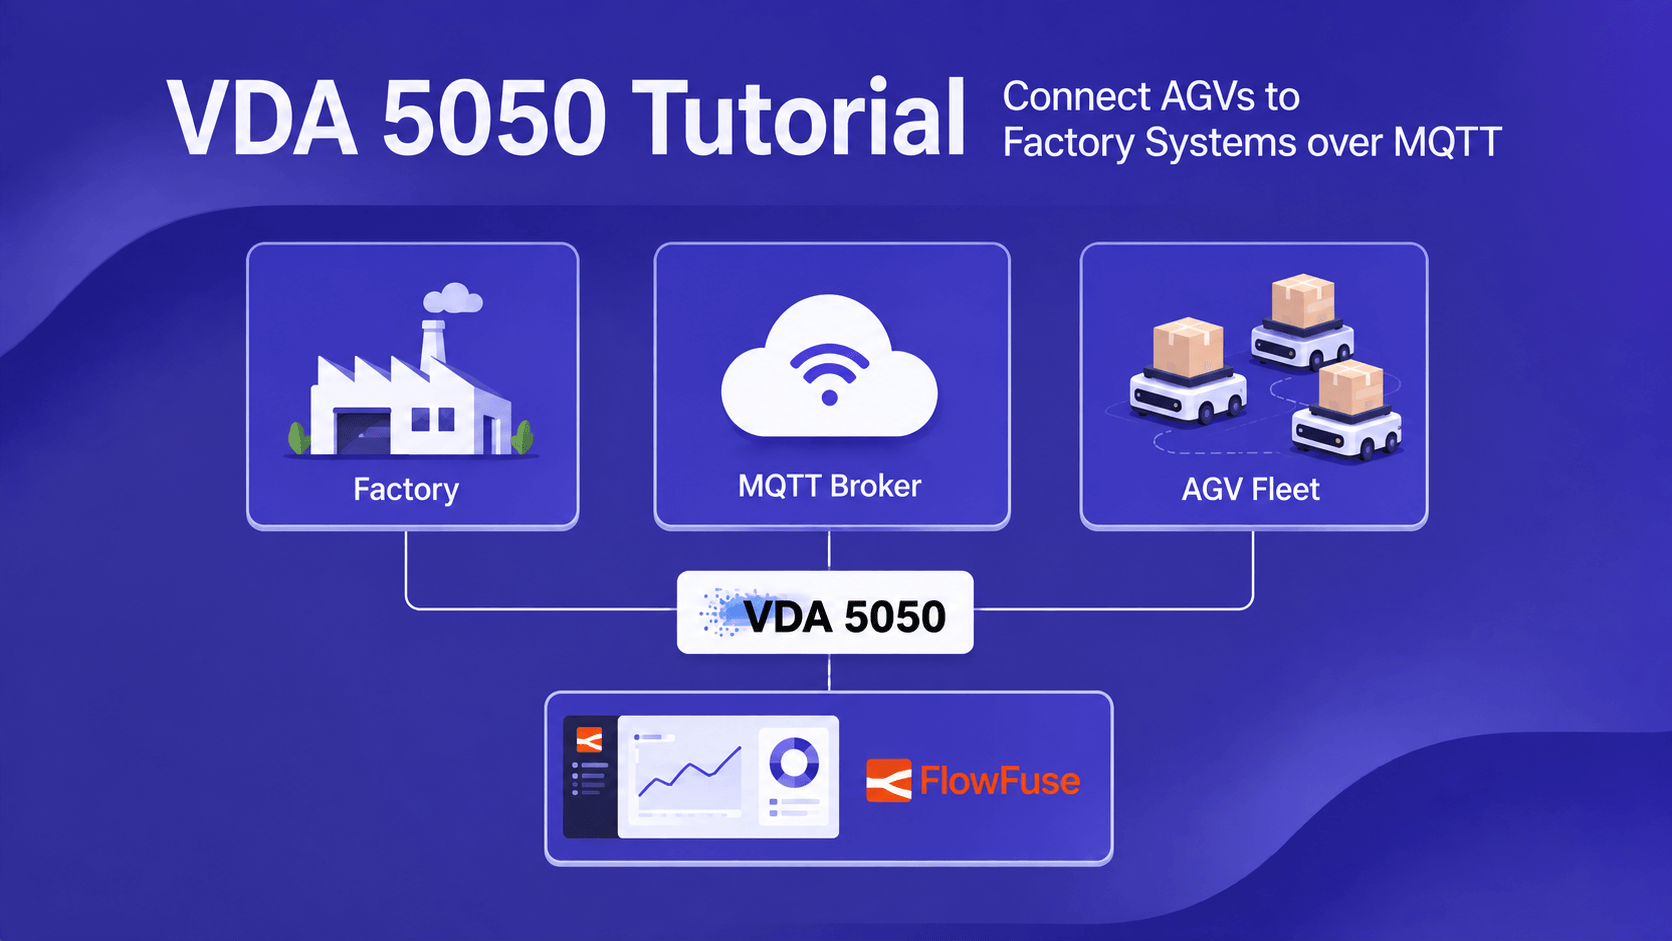
VDA 5050 Tutorial: Connect AGVs to Factory Systems over MQTT
How the six VDA 5050 MQTT topics work, and how to build a master control flow for a mixed AGV fleet.
If you run AGVs from more than one vendor, you already know the problem. Each vendor ships its own fleet manager. Those fleet managers don't talk to each other.
Two fleets under separate control can't share an intersection. So you either accept deadlocks, or you split the floor into separate lanes and waste space. Each fleet manager also needs its own link to your ERP, MES, or WMS. Adding a vehicle from a new vendor means another integration project. And because no single system sees all the work, one vendor's AGVs sit idle while the other's are backed up.
VDA 5050 solves that. FlowFuse gives you somewhere to build the master control system that uses it.
Why VDA 5050?
VDA 5050 is an open communication standard. The VDA (the German automotive association) and the VDMA (the machinery association) publish it together. The Institute for Material Handling and Logistics (IFL) at KIT leads the technical work.
It first appeared in 2019. It sets out how a master control system sends transport orders to a vehicle, and how that vehicle reports back. Messages travel over MQTT as JSON.
Most AGVs and AMRs on factory floors today speak the 2.x version. Version 3.0 came out on 19 March 2026 and adds support for freely navigating robots.
One interface, any vehicle
A master control system that speaks VDA 5050 can drive vehicles from different makers. You don't write a new integration for each one.
The standard fixes the message contract, not the vehicle. How an AGV avoids obstacles or plans its path is still up to the manufacturer. What you get is a shared order format and a shared status format.
If you already run Sparkplug B on the same broker, the two solve different problems. Sparkplug standardizes telemetry from any device. VDA 5050 standardizes a command-and-report contract for one class of device, so it says what an order looks like as well as what a status message looks like.
Safety stays out of scope. Emergency stops and person detection live on the vehicle and follow standards like ISO 3691-4. VDA 5050 reports safety state. It does not implement it.
Real detail, not just a heartbeat
The messages carry operational data. A state message includes position, battery charge, order progress, and any active errors. An order describes a route of nodes and edges with actions attached, such as pick, drop, wait, or charge.
That detail is what lets master control make dispatch decisions, instead of just knowing a vehicle is online.
Built on MQTT
MQTT suits a fleet well. It is lightweight, it uses publish and subscribe, and it copes with devices that drop off the network. Vehicles report when something changes rather than waiting to be polled, which is event-driven architecture applied to a floor full of moving hardware.
Every VDA 5050 topic follows the same pattern. So one wildcard subscription hears from every vehicle on the floor, whoever built it.
The six topics
| Topic | Sent by | Read by | What it carries |
|---|---|---|---|
order | Master control | AGV | A route of nodes and edges, with actions |
instantActions | Master control | AGV | Immediate commands: pause, resume, cancel, start charging |
state | AGV | Master control | Full status: position, battery, order progress, errors |
visualization | AGV | Map displays | Position and velocity only, sent more often than state |
connection | AGV, or the broker for it | Master control | Online and offline at the MQTT level |
factsheet | AGV | Master control | What the vehicle can do: size, load types, supported actions |
Both state and visualization carry position. That is on purpose.
state is the full picture. A vehicle sends it when something changes, and at least once every 30 seconds. visualization is a small message with just position and velocity, so it can go out far more often, typically once a second or faster.
Use state for anything master control acts on. Use visualization only to draw a smooth live map. Note that visualization is optional in the standard, so some vehicles never send it. Version 3.0 widens its job: it now carries the planned path too, so traffic control can read it rather than just a map display.
How topics are named
<interfaceName>/<majorVersion>/<manufacturer>/<serialNumber>/<topic>
For example: uagv/v2/AcmeRobotics/AGV-042/state
uagv is the interface name the standard uses in its own examples, and most people read it as short for "universal AGV". The standard itself only calls it the name of the interface, and each site can set its own. But nearly every 2.x deployment uses uagv, including the vehicles you are likely to buy. Treat it as fixed unless the vehicle's manual says otherwise.
The same caveat applies to the levels around it. The standard mandates the topic names in the final segment, order, state, and so on. It calls the five-level structure a suggestion for a local broker, because cloud brokers impose their own topic rules. On-premise fleets follow it anyway, so build against it and adapt only if your broker forces you to.
The version segment is the major version only. So v2, not v2.0.0. The full version number goes in the version field inside the payload.
Because the maker and serial number sit in the topic, master control can subscribe once to uagv/v2/+/+/state and hear from every vehicle. Restrict each vehicle to its own topic path, using an allowlist on your broker.
A note on version 3.0
This tutorial uses version 2.x names, because that is what most vehicles speak today. Version 3.0 renames a lot:
- The example topic prefix moves to
vda5050/v3/... agvPositionbecomesmobileRobotPositionbatteryStatebecomespowerSupply, andbatteryChargebecomesstateOfChargepositionInitializedbecomeslocalizedsafetyState.eStopbecomesactiveEmergencyStop, and theAUTOACKvalue is goneactionStatessplits intoactionStates,instantActionStates, andzoneActionStates, each cleared by its own instant action- Edges drop
startNodeIdandendNodeId. Position in the sequence alone now says which nodes an edge connects - Errors gain two levels,
CRITICALandURGENT - Every robot must support
startPause,stopPause, andcancelOrder timestampmoves from hundredths of a second to milliseconds- Version 3.0 adds two optional topics,
zoneSetandresponses, and a fourth blocking type,SINGLE CONNECTIONBROKENbecomesCONNECTION_BROKEN, andHIBERNATINGis added- It also adds the operating modes
STARTUPandINTERVENED - The wording changes from "AGV" to "mobile robot" throughout
Version 3.0 also strips abbreviations out of parameter names across the whole document, which is a breaking change. The 3.0.0 release notes link a table of every rename, so check that before you port a 2.x integration.
If your vehicle ships with 3.0 support, swap the names. The topic structure and the ideas below stay the same.
What a state message looks like
{
  "headerId": 42,
  "timestamp": "2026-08-10T09:15:00.000Z",
  "version": "2.1.0",
  "manufacturer": "AcmeRobotics",
  "serialNumber": "AGV-042",
  "orderId": "order-1001",
  "orderUpdateId": 0,
  "lastNodeId": "node7",
  "lastNodeSequenceId": 6,
  "nodeStates": [
    { "nodeId": "node8", "sequenceId": 8, "released": true }
  ],
  "edgeStates": [
    { "edgeId": "node7-8", "sequenceId": 7, "released": true }
  ],
  "agvPosition": {
    "x": 12.4,
    "y": 3.1,
    "theta": 0.0,
    "mapId": "floor1",
    "positionInitialized": true
  },
  "velocity": { "vx": 0.5, "vy": 0.0, "omega": 0.0 },
  "batteryState": { "batteryCharge": 76.5, "charging": false },
  "driving": true,
  "actionStates": [
    { "actionId": "drop-42", "actionStatus": "WAITING" }
  ],
  "operatingMode": "AUTOMATIC",
  "errors": [],
  "safetyState": { "eStop": "NONE", "fieldViolation": false }
}
That vehicle is driving from node7 to node8, with a drop waiting at the end of it. Three things to know before you write code against this.
Some fields are always there. orderId, orderUpdateId, lastNodeId, lastNodeSequenceId, nodeStates, edgeStates, driving, actionStates, batteryState, operatingMode, errors, and safetyState are required. An idle vehicle sends empty nodeStates and edgeStates arrays. It does not drop the fields.
Position is not, but read the exception carefully. agvPosition and velocity are optional. The standard only lets a vehicle omit agvPosition if it cannot localize itself at all, such as a line-guided AGV. A vehicle that can localize but hasn't finished yet still sends the field, with positionInitialized set to false.
So master control needs two checks, not one. Confirm agvPosition is there, then confirm positionInitialized is true before you trust the numbers. Code like msg.payload.agvPosition.x crashes on a line-guided vehicle. Code that skips the second check will route a truck using coordinates the truck itself doesn't stand behind.
Watch the timestamp precision. 2.x writes timestamp with hundredths of a second, while JavaScript's toISOString() gives you milliseconds. Vehicles accept it in practice, and 3.0 moves to milliseconds officially, but a strict schema validator flags it.
The standard ships JSON schemas for all six topics. Point a validator at them and you can check a payload before you send it, rather than finding out from the vehicle.
Build it
What you need
- A running FlowFuse instance on your edge device. If you do not have an account, [sign up for a free trial]({% include "sign-up-url.njk" %}) and set up your instance following the instructions in this guide.
- An MQTT broker your AGVs (or an AGV simulator) already publish to, or FlowFuse's built-in team broker if you're prototyping. If you're still choosing a broker, any one with retained messages, last will, and per-client topic permissions will do.
- At least one vehicle or simulator publishing VDA 5050 topics, so you have real messages to work with.
Step 1: Connect to your broker
- Drag an mqtt in node onto the canvas. Double-click it.
- Click the pencil icon next to Server to add a broker.
- Enter your broker's host and port. Use 8883 and tick Use TLS on the Connection tab. Only use plain port 1883 on an isolated test network.
- On the same tab, set Keep alive to 15 seconds. The standard suggests around that, because the keep alive decides how fast the broker notices a vehicle has vanished. Node-RED defaults to 60, which leaves a dead AGV looking alive for up to a minute and a half.
- If your broker needs a login, open the Security tab and enter the username and password.
- Leave the topic empty for now. You'll fill it in next.
The FlowFuse MQTT nodes replace steps 2 to 5 if you're pointing at the FlowFuse broker. They create the client and fill in the credentials themselves.
Step 2: Subscribe to fleet state
- In the mqtt in node, set Topic to
uagv/v2/+/+/state. Each+stands for one topic level. Here they cover manufacturer and serial number, so this one subscription picks up every vehicle. - Set QoS to 0. VDA 5050 asks for QoS 0 on
order,instantActions,state,factsheet, andvisualization, and QoS 1 only onconnection. Setting a higher QoS on your side doesn't help anyway. MQTT delivers at the lower of the two values. - Set Output to "a parsed JSON object". You then get a JavaScript object instead of raw bytes. If a vehicle sends broken JSON, the node logs an error and drops the message.
- Add a function node (the one from step 3 below) and a debug node after it.
- Deploy. Check that the mqtt in node says "connected", then watch messages arrive in the debug sidebar.
[{"id":"vda-mqtt-in","type":"mqtt in","z":"vda-flow","name":"Fleet state","topic":"uagv/v2/+/+/state","qos":"0","datatype":"json","broker":"vda-broker","nl":false,"rap":true,"rh":0,"inputs":0,"x":210,"y":160,"wires":[["vda-parse"]]},{"id":"vda-parse","type":"function","z":"vda-flow","name":"Identify vehicle","func":"const parts = msg.topic.split('/');\nif (parts.length !== 5) {\n node.warn('Unexpected VDA 5050 topic: ' + msg.topic);\n return null;\n}\n\nmsg.manufacturer = parts[2];\nmsg.serialNumber = parts[3];\n\nconst p = msg.payload;\nif (p.manufacturer !== msg.manufacturer || p.serialNumber !== msg.serialNumber) {\n node.warn('Topic and payload disagree on ' + msg.topic);\n}\n\nreturn msg;","outputs":1,"noerr":0,"initialize":"","finalize":"","libs":[],"x":430,"y":160,"wires":[["vda-debug"]]},{"id":"vda-debug","type":"debug","z":"vda-flow","name":"State debug","active":true,"tosidebar":true,"console":false,"tostatus":false,"complete":"payload","targetType":"msg","statusVal":"","statusType":"auto","x":650,"y":160,"wires":[]},{"id":"vda-broker","type":"mqtt-broker","name":"VDA 5050 broker","broker":"your-broker.example.com","port":"8883","clientid":"","autoConnect":true,"usetls":true,"verifyservercert":true,"protocolVersion":"4","keepalive":"15","cleansession":true,"autoUnsubscribe":true,"birthTopic":"","birthQos":"0","birthPayload":"","birthMsg":{},"closeTopic":"","closeQos":"0","closePayload":"","closeMsg":{},"willTopic":"","willQos":"0","willPayload":"","willMsg":{},"sessionExpiry":""}]
Flow exports never include passwords. After importing, open the broker node and enter your own host and login.
Step 3: Tell the vehicles apart
The state message tells you what is happening. You also need to know who sent it.
manufacturer and serialNumber appear twice: in the payload, and in the topic. Read them from the topic. Here's why.
The topic is the message's address. It is what your broker rules are written against, so it's the right value to route and store by.
Comparing the two is also a free sanity check. If a vehicle's payload disagrees with its topic, it is misconfigured. Better to see that in a log line than to find out when an order goes to the wrong truck.
Put a function node between the mqtt in node and whatever comes next:
const parts = msg.topic.split('/');
if (parts.length !== 5) {
    node.warn('Unexpected VDA 5050 topic: ' + msg.topic);
    return null;
}

msg.manufacturer = parts[2];
msg.serialNumber = parts[3];

const p = msg.payload;
if (p.manufacturer !== msg.manufacturer || p.serialNumber !== msg.serialNumber) {
    node.warn('Topic and payload disagree on ' + msg.topic);
}

return msg;
Now msg.payload holds the state object, and msg.manufacturer and msg.serialNumber tell you which AGV sent it.
Step 4: Catch vehicles going offline
Repeat the same pattern for one more topic, pointing it at the broker you already set up.
Subscribe to uagv/v2/+/+/connection at QoS 1. This tells you when a vehicle drops off the broker. The payload has a connectionState field with one of three values in 2.x:
ONLINEOFFLINEfor a clean, deliberate disconnectCONNECTIONBROKENfor an unexpected drop
The vehicle registers that last value as its MQTT last will when it connects. So if it vanishes without saying goodbye, the broker publishes it for the vehicle. Vehicles publish every connection message with the retained flag set, so a new subscriber picks up each vehicle's last known status straight away.
This is where the keep alive from step 1 earns its place. The broker only fires the last will once the heartbeat lapses, so a 60-second keep alive can hide a dead vehicle for well over a minute.
One warning. connection is a network check, not a health check. Version 3.0 states that outright in its topic table, and 2.1 works the same way without saying it as plainly. It tells you the link dropped. It tells you nothing about a vehicle that is still connected but faulted, stuck, or lost. For that, watch errors, operatingMode, and safetyState in state. Also treat any state message older than 30 seconds as stale, since that is the longest gap the standard allows.
Putting it on a screen
None of this is visible to anyone on the floor yet. You can build a screen from these same flows with FlowFuse Dashboard, without writing any HTML: a table of vehicles with battery level and current order, an alert when a vehicle drops off the network, and a live map of where everything is.
Step 5: Send an order
Three rules decide whether the vehicle accepts your order at all. Get these wrong and it refuses.
The first node must be where the vehicle already is. The standard says the AGV has to be standing on the first node, or inside its deviation range. Send an order that starts anywhere else and the vehicle rejects it. A rejected order shows up as a validationError warning in the vehicle's state, and the warning stays there until it accepts a valid order. Read lastNodeId and agvPosition from the vehicle's current state, and build the order from there.
orderId and orderUpdateId together must be new. Use a fresh orderId for each job. Start orderUpdateId at 0, and only raise it when you extend that same order. A 2.x vehicle checks the incoming orderUpdateId against the one it already holds, treating a lower one as deprecated and an equal one as already received. Version 3.0 draws the line more precisely: resending an identical message is fine, but reusing an orderUpdateId with different content is an error.
The vehicle must support the actions you send. pick and drop are standard action types, but supporting them is optional. Ask for the vehicle's factsheet first, using the factsheetRequest instant action, and check its list of supported actions.
Then wire it up:
- Add an mqtt out node pointing at your broker. Leave Topic empty so the flow can set
msg.topicper vehicle. Leave Retain off. The broker re-delivers a retained order every time the vehicle reconnects, which is how you move a truck at 3am by accident. - Feed it a payload matching the order schema: a
nodesarray and anedgesarray. - Trigger it with a dashboard button for manual dispatch, or from an http in endpoint if orders come from your WMS.
Here is a real pick-and-drop order:
const manufacturer = 'AcmeRobotics';
const serialNumber = 'AGV-042';

msg.topic = `uagv/v2/${manufacturer}/${serialNumber}/order`;

// headerId counts per topic, so key the counter by topic and raise it
// by one for every message you send to that topic
const headerKey = `headerId:${msg.topic}`;
const headerId = (flow.get(headerKey) || 0) + 1;
flow.set(headerKey, headerId);

msg.payload = {
  headerId,
  timestamp: new Date().toISOString(),
  version: "2.1.0",
  manufacturer,
  serialNumber,
  orderId: `order-${Date.now()}`,
  orderUpdateId: 0,
  nodes: [
    {
      // The AGV must already be at this node, or within its deviation range
      nodeId: "station-1",
      sequenceId: 0,
      released: true,
      nodePosition: { x: 0, y: 0, mapId: "floor1" },
      actions: [{
        actionId: `pick-${headerId}`,
        actionType: "pick",
        blockingType: "HARD",
        actionParameters: [
          { key: "stationType", value: "floor" },
          { key: "loadType", value: "EPAL" }
        ]
      }]
    },
    {
      nodeId: "station-2",
      sequenceId: 2,
      released: true,
      nodePosition: { x: 12, y: 4, mapId: "floor1" },
      actions: [{
        actionId: `drop-${headerId}`,
        actionType: "drop",
        blockingType: "HARD",
        actionParameters: [
          { key: "stationType", value: "floor" },
          { key: "loadType", value: "EPAL" }
        ]
      }]
    }
  ],
  edges: [{
    edgeId: "station-1-2",
    sequenceId: 1,
    startNodeId: "station-1",
    endNodeId: "station-2",
    released: true,
    actions: []
  }]
};
return msg;
Set version to the version your vehicle actually runs. Its factsheet and its own state messages both tell you.
Note the counter keyed by topic. headerId is defined per topic and rises by one per message, so a single shared counter across two vehicles leaves gaps in both their sequences.
Four more details matter. sequenceId counts across nodes and edges together, which is why the edge is 1, sitting between nodes 0 and 2. released: true marks the base, the part of the plan the vehicle should run now, as opposed to the horizon, which is work it knows about but hasn't been told to start. And actionId has to be unique, because that is how the vehicle reports progress back to you in actionStates.
blockingType is the one worth reading twice. It decides whether the vehicle can drive, and whether other actions can run at the same time. HARD means the action runs alone, with no driving and no other actions. SOFT allows other actions but still stops the vehicle. NONE allows both. For a pick or drop you want HARD, and note that SOFT does not let the AGV keep driving, which is the one people get backwards. Version 3.0 adds a fourth, SINGLE, which allows driving but no other actions.
[{"id":"vda-order-trigger","type":"inject","z":"vda-flow","name":"Dispatch order","props":[{"p":"payload"}],"repeat":"","crontab":"","once":false,"onceDelay":0.1,"topic":"","payload":"","payloadType":"date","x":210,"y":320,"wires":[["vda-order-build"]]},{"id":"vda-order-build","type":"function","z":"vda-flow","name":"Build order payload","func":"const manufacturer = 'AcmeRobotics';\nconst serialNumber = 'AGV-042';\n\nmsg.topic = `uagv/v2/${manufacturer}/${serialNumber}/order`;\n\n// headerId counts per topic, so key the counter by topic\nconst headerKey = `headerId:${msg.topic}`;\nconst headerId = (flow.get(headerKey) || 0) + 1;\nflow.set(headerKey, headerId);\n\nmsg.payload = {\n headerId,\n timestamp: new Date().toISOString(),\n version: \"2.1.0\",\n manufacturer,\n serialNumber,\n orderId: `order-${Date.now()}`,\n orderUpdateId: 0,\n nodes: [\n { nodeId: \"station-1\", sequenceId: 0, released: true, nodePosition: { x: 0, y: 0, mapId: \"floor1\" }, actions: [{ actionId: `pick-${headerId}`, actionType: \"pick\", blockingType: \"HARD\", actionParameters: [{ key: \"stationType\", value: \"floor\" }, { key: \"loadType\", value: \"EPAL\" }] }] },\n { nodeId: \"station-2\", sequenceId: 2, released: true, nodePosition: { x: 12, y: 4, mapId: \"floor1\" }, actions: [{ actionId: `drop-${headerId}`, actionType: \"drop\", blockingType: \"HARD\", actionParameters: [{ key: \"stationType\", value: \"floor\" }, { key: \"loadType\", value: \"EPAL\" }] }] }\n ],\n edges: [\n { edgeId: \"station-1-2\", sequenceId: 1, startNodeId: \"station-1\", endNodeId: \"station-2\", released: true, actions: [] }\n ]\n};\nreturn msg;","outputs":1,"noerr":0,"initialize":"","finalize":"","libs":[],"x":440,"y":320,"wires":[["vda-order-out"]]},{"id":"vda-order-out","type":"mqtt out","z":"vda-flow","name":"Send order","topic":"","qos":"0","retain":"false","respTopic":"","contentType":"","userProps":"","correl":"","expiry":"","broker":"vda-broker","x":680,"y":320,"wires":[]},{"id":"vda-broker","type":"mqtt-broker","name":"VDA 5050 broker","broker":"your-broker.example.com","port":"8883","clientid":"","autoConnect":true,"usetls":true,"verifyservercert":true,"protocolVersion":"4","keepalive":"15","cleansession":true,"autoUnsubscribe":true,"birthTopic":"","birthQos":"0","birthPayload":"","birthMsg":{},"closeTopic":"","closeQos":"0","closePayload":"","closeMsg":{},"willTopic":"","willQos":"0","willPayload":"","willMsg":{},"sessionExpiry":""}]
This snippet brings its own broker node so it imports on its own. If you paste it into the same tab as the flow from step 2, you'll end up with two. Point this flow at the one you already set up and delete the spare, or the two clients will fight over the same login.
The inject node keeps the import simple. Swap it for a ui-button once your dashboard exists.
Before this touches real AGVs
A flow that works on a test rig is not a production system. Check these first.
- Lock down the broker. Restrict each AGV to its own topic path. Give the wildcard subscription to master control only. Use an allowlist, not a blocklist.
- Use TLS. Factory networks are shared. Fleet commands should not travel in clear text, and leave certificate checking on.
- Never retain
orderorinstantActions. The broker replays retained commands to every vehicle that reconnects.connectionandfactsheetare the two topics that should be retained. - Match the standard's QoS levels. QoS 0 for
order,instantActions,state,factsheet, andvisualization. QoS 1 forconnection. If your site does something different, change it on both ends, since MQTT delivers at the lower of the two. - Set the keep alive to around 15 seconds. It sets the floor on how fast you can detect a vehicle dropping off, so a long keep alive quietly undoes your offline alerting.
- Watch state freshness, not just
connection. A vehicle can hold its connection open while stuck or faulted. Alert onerrors, onoperatingModeleavingAUTOMATIC, and onstatemessages older than 30 seconds. - Validate orders before you send them. Check the first node against the vehicle's current position, keep
orderIdandorderUpdateIdunique, and check every action type against the factsheet. - Cap message size on the broker to what VDA 5050 payloads actually need. It limits the damage a misbehaving client can do.
What's next
You now have the basics: subscribe to fleet state, tell vehicles apart, spot vehicles going offline, and send orders. That's enough for a pilot with two or three AGVs.
The next thing most teams do is replace the button with the WMS or ERP, so orders arrive from whatever already decides what needs moving. After that comes order updates and cancellation, because a job that can't be extended or pulled back mid-route is not much use on a real floor. Both of those need the vehicle's factsheet, so it's worth requesting and storing it early. Master control can then check load capacity, size, and supported actions before it dispatches anything.
Two bigger pieces usually wait until the pilot has proved itself. Logging state history gives you throughput and utilization numbers, which is normally what makes the case for expanding. Publishing that state into a Unified Namespace puts it alongside the rest of your production data, so the systems that plan the work can see where the vehicles are. Traffic rules come last, and only once vehicles from different vendors start sharing aisles, because that is the point where a single master control system stops being a convenience and starts being the reason the floor works at all.
When the pilot becomes a deployment, FlowFuse adds the parts a real fleet system needs: remote device management for edge gateways, snapshots and instant rollback, audit logs, DevOps Pipelines, team access control, and high availability.
Run Every AGV From One System
See how FlowFuse connects AGVs from any vendor over VDA 5050, takes orders from your WMS, and rolls the same master control setup out to every site you run.
About the Author
Sumit Shinde
Technical Writer
Sumit Shinde is a Technical Writer at FlowFuse specializing in industrial automation and manufacturing. In the past three years, he has built industrial applications and authored more than 100 technical articles covering industrial connectivity, unified data architecture, production metrics, and quality management for modern manufacturing.
Like what you're reading?
Add FlowFuse as a preferred sourceOn the page that opens, check the box next to flowfuse.com to see more of our articles in your Google Search results.